Blog Archives

DIY Monday: Homemade Chocolate Frosty
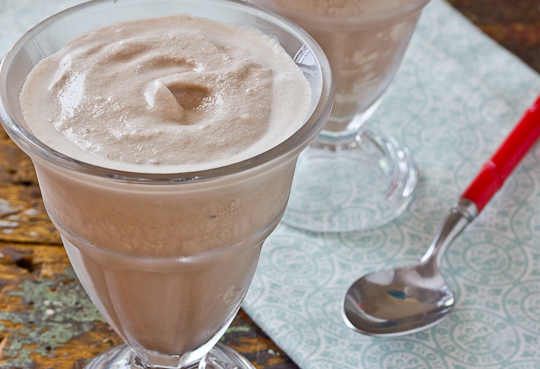
Question: Have you ever had a frosty from Wendy’s?
If you answered yes then you know that on a HOT summer day there is nothing better than this chocolaty treat. It’s Rich, Creamy and Oh So Dreamy! So when I ran across this copy cat recipe I was like, SCORE! So go ahead, INDULGE a little! It’s inexpensive, delicious, and you will score “The Coolest Mom EVER!” points! Besides you deserve it.
P.S. Don’t let the summer pass you by without giving this recipe a try.
INGREDIENTS
- 2 cups whole milk
- 1/2 cup (4 ounces) chocolate syrup
- 1 (7 ounce) can sweetened condensed milk
- 1/2 cup heavy cream
- 1/2 teaspoon pure vanilla extract
INSTRUCTIONS
- Whisk together the milk, chocolate syrup, and condensed milk, and refrigerate until chilled, at least one hour. In a separate mixing bowl, beat the heavy cream and vanilla until soft peaks just begin to form. Refrigerate until ready to use.
- Turn on ice cream maker. Pour the chocolate milk mixture into the already running bowl of the ice cream maker and freeze according to manufacturers instructions (about 15 – 20 minutes). Once the ice cream is thick, turn the maker off, remove the paddle, and fold in the chilled whipped cream until it is completely incorporated.
- Serve immediately, or transfer to a covered, freezer-safe container and freeze. (If freezing, let ice cream soften a few minutes before serving; you want it to be the consistency of a milkshake.)

Kiwi Popsicles

Okay all week I have been telling my husband I want Popsicles. But that’s no surprise I Love Them. Popsicles, Popsicles, Popsicles. Oooo, I just thought about the bomb pops from the ice cream truck. Mmmmm 🙂 I WANT A POPSICLE! OK focus Tameca. Now back to the post, this is a cool refreshing kiwi fruit pop. A perfect snack on a Hot Summer Day!
Recipe & Photo is courtesy of Divas Can Cook
Ingredients
- 4 ripe kiwi
- 1½ cups pineapple juice, naturally sweetened
- ½ teaspoon sugar *optional* (you could also use honey, agave or more pineapple juice to make it sweeter naturally)
Instructions
- Carefully slice the kiwi in half and spoon out the flesh.
- Place the kiwi into a food processor.
- Pour in pineapple juice.
- Blend on low speed for a few seconds. Be careful not to over blend to avoid the seeds breaking or it will produce a bitter taste.
- Give it a taste. You may add a little sugar, honey or agave to sweeten.
- Pour the mixture into the popsicle mold.
- Insert popsicle sticks. Freeze for 6 hours or until completely frozen.
- Run the popsicle mold under warm water to remove the frozen popsicles.

Nutella Popsicles
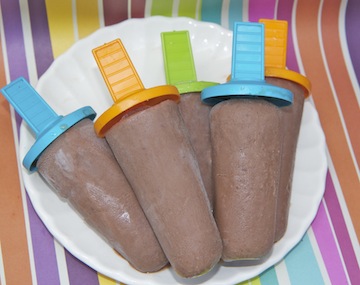
I remember when I first introduced myself to Nutella. I was like, “Where have you been all my life?” And now I have discovered they have a nutella popsicle recipe. Oh My Goodness! I just died and went to Heaven.
Recipe & Photo is courtesy of Divas Can Cook
Ingredients
- ½ cup Nutella
- ½ cup sweetened condensed milk
- 1 cup soy milk
- ½ cup coconut milk
- ½ teaspoon vanilla extract
- Pinch of salt
Instructions
- Place all ingredients into a bowl.
- Mix until creamy.
- Pour into popsicles molds.
- Freeze overnight.
- Run molds under warm water to loosen the popsicles.
- Enjoy.

Strawberry Cheesecake Popsicles

OMG! Who loves cheesecake? I DO! And I found another recipe that would fit the bill for these EXTREMELY HOT summer days ahead. And here in the great state of Florida the summer never ends. LOL. So try this recipe on for size. I think that you might like it. I sure do. Hello Summer 🙂
Recipe & Photo courtesy of Divas Can Cook
Ingredients
- 1¾ cups strawberries, diced
- 1 Tablespoon water
- 1-3 Tablespoons sugar (depending on how sweet the strawberries already are)
- 4-6 oz cream cheese, softened
- ¾ cup sweetened condensed milk
- ¼ cup milk (I used almond milk)
- 1 tablespoon lemon juice
- ½ teaspoon vanilla extract (optional)
Instructions
- In a saucepan, over medium heat add water, strawberries, sugar.
- Cook until strawberries are soft enough to completely mash with a potato masher or fork.
- Taste and add more sugar if needed. It should be sweet yet still have a little natural tartness.
- Removed mashed strawberries from heat and let cool.
- Place strawberry mixture in a blender and blend until completely pureed.
- Refrigerate until cold.
- In a large bowl cream together cream cheese, sweetened condensed milk, milk, lemon juice and vanilla extract (if using).
- Layer the mixture into popsicle molds. Starting with a little bit of the strawberry mixture or any way you desire.
- Use a wooden skewer to swirl the mixture if desired.
- Freeze overnight.
- Run popsicle mold under warm water to release the frozen popsicles.
- Enjoy!
*Chef’s Tip: This is a great recipe to BYOC (Be Your Own Chef). Try & experiment with different fruits like blueberry, cherry or better yet chocolate. The options are endless!

Raspberry Lemonade Yogurt Pops

Me love myself some popsicles. And with the warm weather upon us I am all in! So today I have a new recipe that I came across that I sooo had to share. RASPBERY LEMONADE YOGURT POPS, WHAT! Hope your taste buds are ready. Cause they are in for a cool, refreshing treat.
Recipe & Photo is courtesy of The Slow Roasted Italian
Ingredients
- ¼ cup granulated sugar
- 1 tablespoons lemon zest (zest of one lemon)
- ½ cup fresh lemon juice (about 2 lemons juiced)
- 1 ½ cups plain yogurt
- 6 ounces fresh raspberries, cleaned (large ones cut in half)
Instructions
- Evenly distribute raspberries between ice pop molds. Set aside.
- In a medium bowl, combine lemon zest and sugar. Smash lemon zest with a fork until all sugar is coated in lemon. Add lemon juice and yogurt. Stir until well combined.
- Pour into molds. Cover with aluminum foil and add sticks. Freeze for 4-24 hours.
- Eat & Enjoy!!!

Fudge Brownie Pie
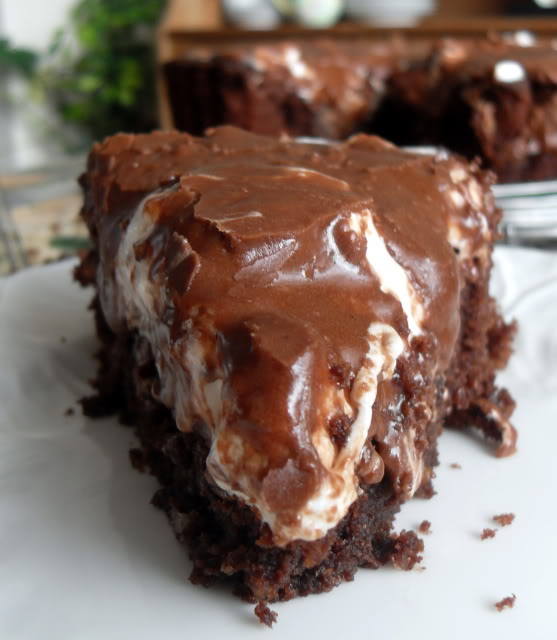
So you may ask, What is this recipe that I see on the screen? It’s Something Rich! Something Chocolatey! Something Oh So Divine! Yes! It is none other than “The Fudge Brownie Pie.” This is definitely a must if you love Chocolate like we do. So go ahead and get that tall, ice cold glass of milk ready. Cause this recipe is about to put you in a straight sugar shock.
Recipe & Photo Courtesy of The English Kitchen
Ingredients
- 3/4 cup flour
- 1 cup caster/bakers sugar
- 1/4 cup unsweetened cocoa powder, sifted
- 1 tsp baking powder
- 1/4 tsp salt
- 4 ounces butter, melted
- 2 large eggs, beaten
- 2 tsp vanilla
- 1/2 cup chopped toasted pecans
- 2 handfuls of mini marshmallows
for the frosting:
- 1/4 butter, melted
- 1/4 cup cocoa powder, sifted
- 1/4 cup evaporated milk
- 1 cup icing sugar, sifted
Instructions
- Preheat the oven to 350*F. Butter a 9 inch flan pan with a removable bottom. Set aside.
- Whisk together the flour, sugar, cocoa powder, baking powder and salt in a bowl.
- In a separate bowl beat together the butter, eggs and vanilla. Add to the dry ingredients and mix until smooth. Stir in the toasted nuts. Pour into the prepared pan. Bake on a middle shelf of the oven for 25 to 30 minutes, or until a toothpick inserted in the center comes out clean. Immediately sprinkle the marshmallows on top and return to the oven for a few minutes to melt the marshmallows. Remove from the oven and carefully spread the chocolate frosting over top.
- To make the chocolate frosting mix all ingredients together in a bowl, beating with an electric whisk until smooth and thick. Spread on the hot marshmallows.
- Let cool completely. Cut into wedges to serve.

Simple Cream Cheese Danish
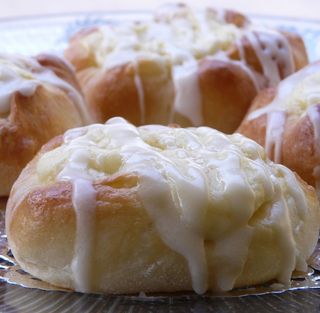
When I was a little girl we would periodically make these trips down home. Down home to Marion, AL to visit my Great-Grandma Annie Lou and Great-Grandpa Bose. Even though these trips were only a 2 1/2 hour drive one way; we would always stop in Historic Selma, AL for breakfast. And without fell I would always order a Ham & Cheese Omelet w/ Hash Browns, Cheese Danish and Orange Juice. It was something so simple but sooooo good. So when I came across this recipe I was like, “WOW! All this time I could have been making this delicacy at home.” It’s so easy peasy you wont even break a sweat. And that’s a Good Thing!
Recipe and Photo is courtesy of Food Lush
Ingredients
- 2 cans of crescent rolls
- 1 8oz package of cream cheese, softened
- 1/2 cup white sugar
- 1 tsp lemon juice
- 3/4 tsp vanilla
- 1 tsp sour cream
- Optional: pie filling or fruit preserves of your choice
for icing:
- 1 cup confectioner’s sugar
- 1 tbsp milk
- 1 tbsp softened butter
Instructions
- Preheat the oven to 350 degrees F.
- Open the crescent rolls carefully to avoid unrolling or tearing the dough. You’ll need to leave it in it’s cylindrical shape. Slice the dough into pieces about 1/4 inch thick (as though you’re slicing cookie dough). Place the slices on a cookie sheet and press the center in to make an indentation for the cream cheese filling.
- In a large mixing bowl, mix together the cream cheese, white sugar, lemon juice, vanilla and sour cream. Add a dollop of the mixture to the indentation you made in each circle of dough. I find that about a tbsp works well, but you can use as little or as much as you like. If you like fruit with your danish, you can also add it to the rolls before the cream cheese mixture. (I like cherry pie filling or blackberry preserves, personally.) Bake for 15 – 20 minutes.
- While the danishes are baking, make the icing to drizzle over the tops. Mix together the confectioner’s sugar, milk and butter in a small bowl. You can use a spoon to drizzle it over the tops of the danish, or you can put it into a small zip-top bag and snip of the corner for an easy “piping bag.”
- Take the danishes out of the oven and allow them to cool for 10-15 minutes before icing.

Lemonade Icebox Pie

This recipe is easy as pie. No Really! It’s just that simple. 6 ingredients & no fuss. Now hard can that be? So get yo’ appetite ready. It’s time to tickle those taste buds. Cause the warm weather is here to stay! #HelloLover
Recipe & Photo Courtesy of Taste Of Home
Ingredients
- 1 package (8 ounces) Philadelphia® Cream Cheese, softened
- 1 can (14 ounces) sweetened condensed milk
- 3/4 cup thawed lemonade concentrate
- 1 carton (8 ounces) frozen whipped topping, thawed
- Yellow food coloring, optional
- 1 graham cracker crust (9 inches)
- lemon slices, for garnish
Instructions
- In a large bowl, beat cream cheese and milk until smooth. Beat in lemonade concentrate.
- Fold in whipped topping and food coloring if desired.
- Pour into crust. Cover and refrigerate until set.

Peanut Butter Oreo Icebox cake
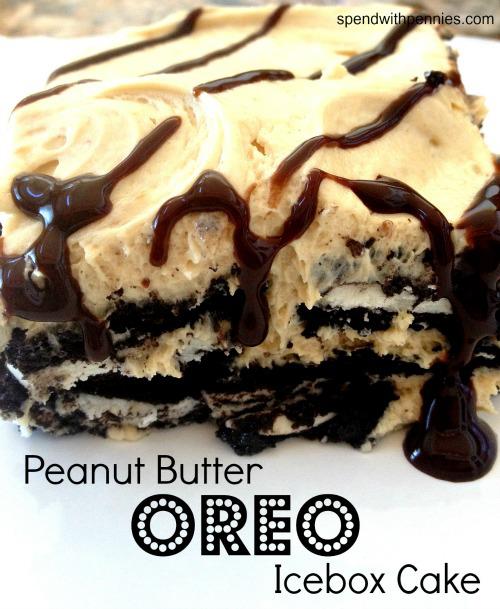
If I’ve said it once. I’ve said it a thousand times … “I LOVE PEANUT BUTTER & CHOCOLATE.” As always I’m strolling social media and what appears on my computer screen? This dessert right chere! Yes I typed Right Chere, LOL. Anywho, It was like the earth had stop moving and the angelic chorus had started singing when my eyes locked in on this beauty. This is most definitely a must try in the Porter House. So now that I have peaked your interest & tantalized the tastebuds, head on over to Spend With Pennies to get the complete ingredient list & instructions on how to make this delectable dessert. You’ll #ThankMeLater. ENJOY!
Recipe & Photo is courtesy of Spend With Pennies Facebook Page

Stuffed Chocolate Dipped Strawberries

Valentine’s Day is drawing near and I always get SUPER excited. You see in the Porter House Valentine’s Day for my husband & I is like Christmas for the kids. Yes! Valentine’s Day. A day filled with Love and Romance and Passion and Kisses and Candy and Flowers and Dinner and ok ok you already know. But even though the Porter’s are like that 365, 24/7 …. It’s just something about February the 14. It’s like EXTRA Special. A day designed for LOVE. I know by now you are like Tameca .. the strawberries ??? OK! enough rambling so I guess i’ll move on. Soooo just when you think chocolate covered strawberries were the belle of the ball, thebomb.com, the Pièce de résistance. BAM! The world is introduced to stuffed chocolate dipped strawberries. Talk about a Oh, My Goodness moment. I don’t know who came up with the concept but they got a sure winner with me. #WishingIHadSomeNow
Ingredients
- 12 strawberries
- 3/4 c milk chocolate chips (can use semi-sweet)
- 3 oz cream cheese
- 2 – 3 Tbsp powdered sugar
- 1/4 tsp almond extract
- chopped almonds, nuts, graham cracker crumbs (optional for garnish)
Instructions
- Rinse and halve strawberries lengthwise. Core out the center but leave the stem on. Dry on paper towels.
- Melt chocolate in microwave bowl until melted…stirring regularly.
- Line a cookie sheet with wax paper.
- Hold strawberry by the stem and dip in the chocolate, covering half of the strawberry. Place on the wax paper lined sheet.
- Beat together cream cheese, powdered sugar, and almond extract. Spoon into a pastry bag. Pipe into strawberries. Sprinkle the nuts or graham cracker crumbs on top for garnish (optional).
- Enjoy with your Sweetie & a glass of wine or champagne.
