Blog Archives

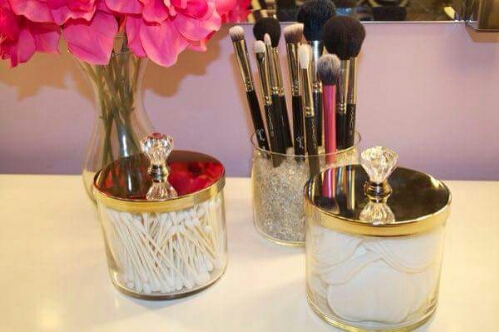
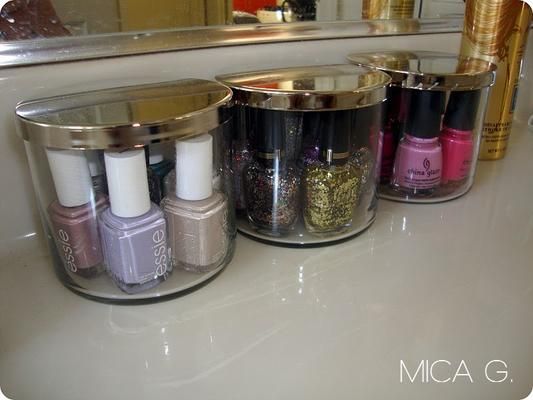
DIY Monday: Re-Purposed BBW Candle Jars
I LOVE CANDLES! But most of all I LOVE Bath & Body Works Candles. No other candles compare; Seriously, They are truly my absolute fave! I think I have become more like obsessed with them over the years. I literally have one in every room. House smells like Heaven! But after the sweet smelling aroma has burnt out I often wondered what can I possibly do with all these empty vessels. They’re to pretty to just throw away. And as luck would have it I found some great re-purpose ideas on my favorite social media sites that I just had to share with you. Happy DIY’ing!
![]() XO, Sunshine
XO, Sunshine


DIY Monday: Homemade Chocolate Frosty
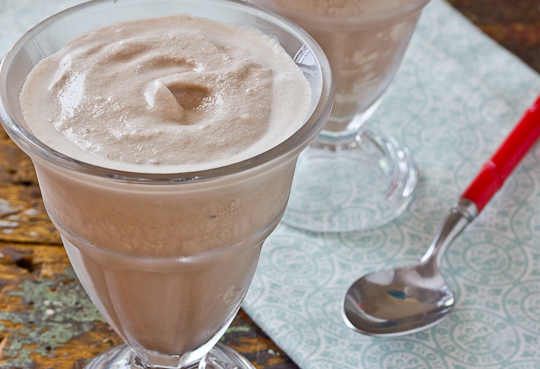
Question: Have you ever had a frosty from Wendy’s?
If you answered yes then you know that on a HOT summer day there is nothing better than this chocolaty treat. It’s Rich, Creamy and Oh So Dreamy! So when I ran across this copy cat recipe I was like, SCORE! So go ahead, INDULGE a little! It’s inexpensive, delicious, and you will score “The Coolest Mom EVER!” points! Besides you deserve it.
P.S. Don’t let the summer pass you by without giving this recipe a try.
INGREDIENTS
- 2 cups whole milk
- 1/2 cup (4 ounces) chocolate syrup
- 1 (7 ounce) can sweetened condensed milk
- 1/2 cup heavy cream
- 1/2 teaspoon pure vanilla extract
INSTRUCTIONS
- Whisk together the milk, chocolate syrup, and condensed milk, and refrigerate until chilled, at least one hour. In a separate mixing bowl, beat the heavy cream and vanilla until soft peaks just begin to form. Refrigerate until ready to use.
- Turn on ice cream maker. Pour the chocolate milk mixture into the already running bowl of the ice cream maker and freeze according to manufacturers instructions (about 15 – 20 minutes). Once the ice cream is thick, turn the maker off, remove the paddle, and fold in the chilled whipped cream until it is completely incorporated.
- Serve immediately, or transfer to a covered, freezer-safe container and freeze. (If freezing, let ice cream soften a few minutes before serving; you want it to be the consistency of a milkshake.)

DIY Monday: Homemade Cough Syrup
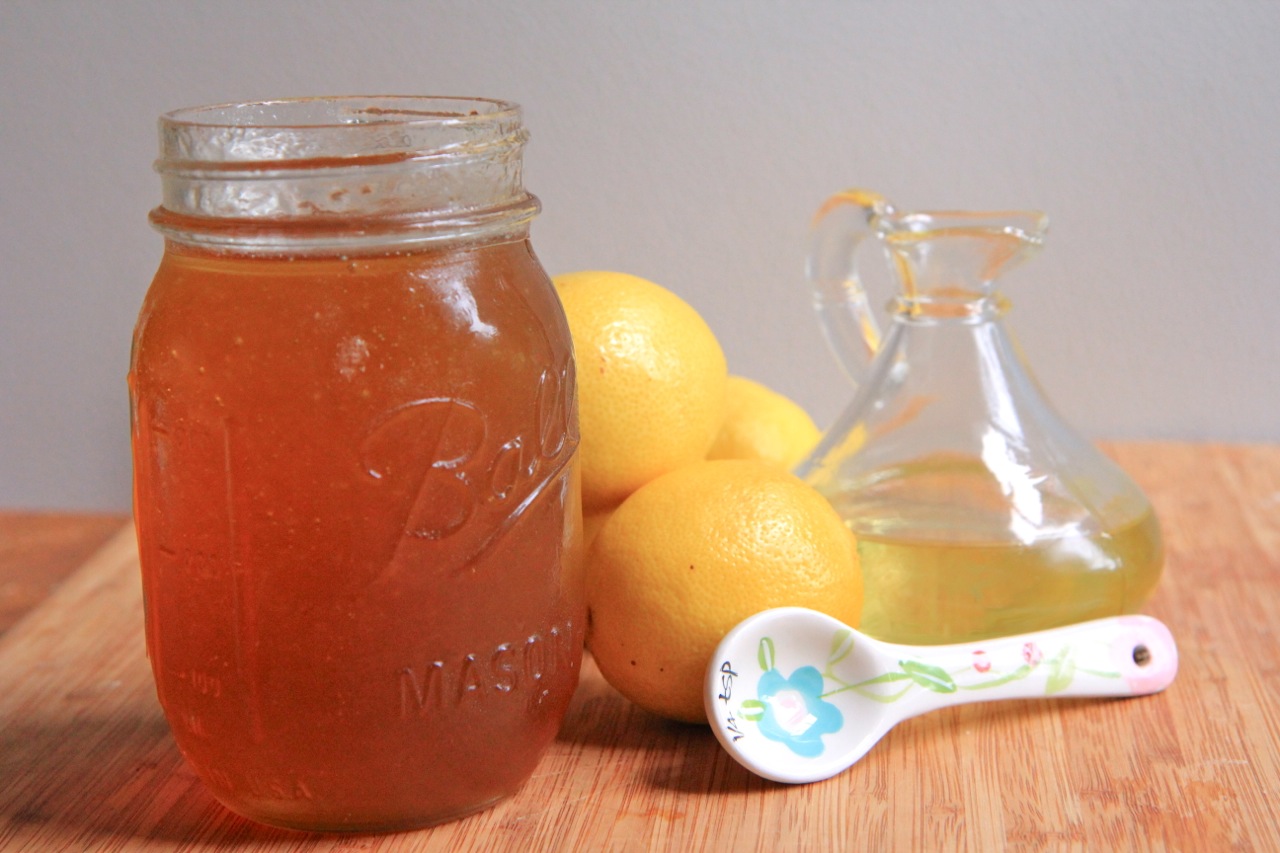
Cold & Flu season is epic this year. It seems as if everyone I know, including myself have been battling with some sort of illness this season. Which brings me to this post “Homemade Cough Syrup”. Now back in the day good ole’ grandma would serve us up a concoction that consist of some type of whiskey. Yeah I said it whiskey. Believe you me it put us right on to sleep. And for a few hours I might add. LOL. Anywho, this recipe is just as great, All-Naturale, 3 ingredients & alcohol-free. So make up a batch today. You’ll thank me later!
Here’s What You Need:
1½ cups organic raw honey
½ cup organic extra virgin olive oil
1-5 organic lemons, juiced (the more the better)
Instructions:
Add honey, olive oil and lemon juice to a small pot. Stir to combine ingredients.
Heat over medium heat just until steaming, continue stirring.
Remove from heat and let cool.
Place into a mason jar with a lid.
Store in the refrigerator.
Take 1-2 tablespoons as needed or simply add some to a cup of hot tea.

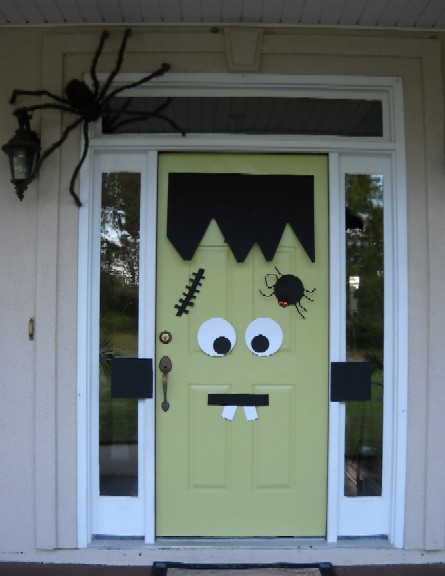
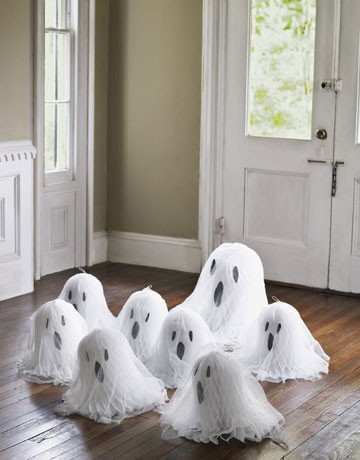
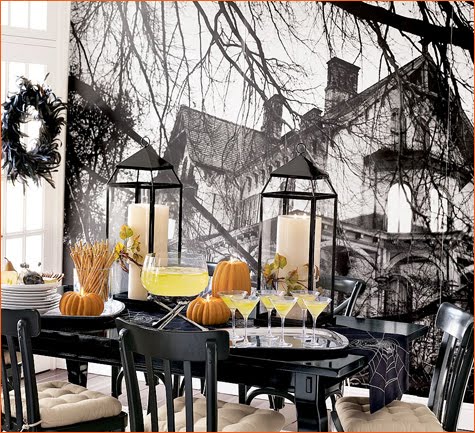
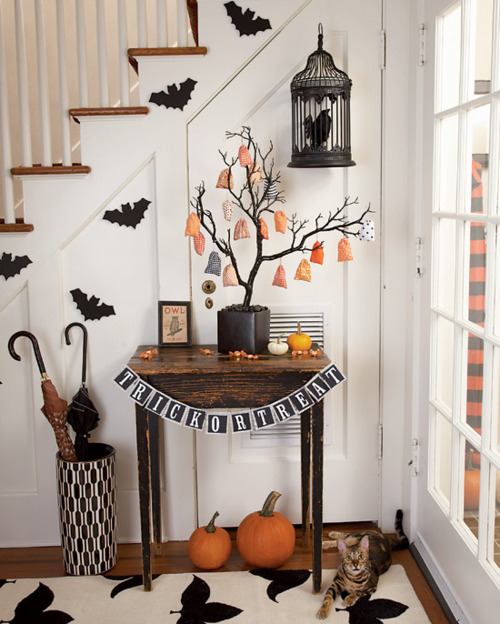
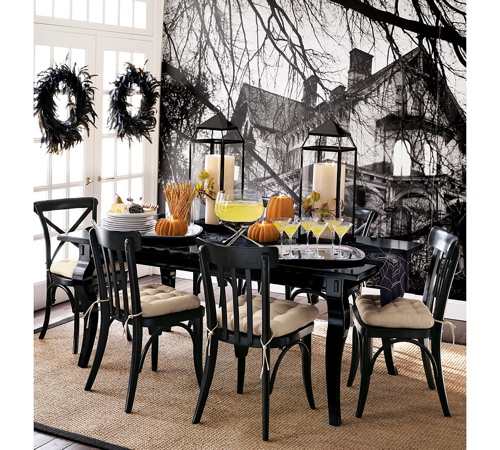
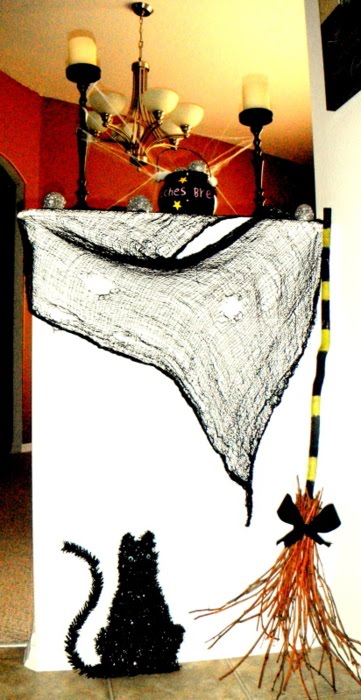
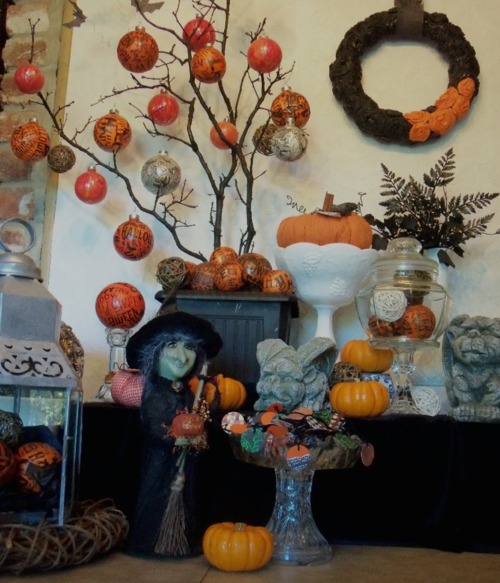
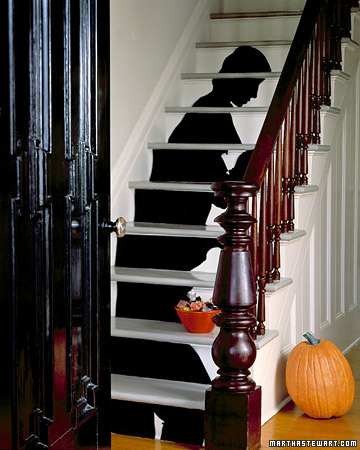
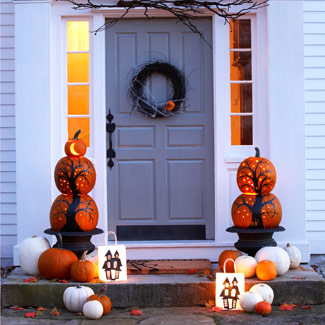
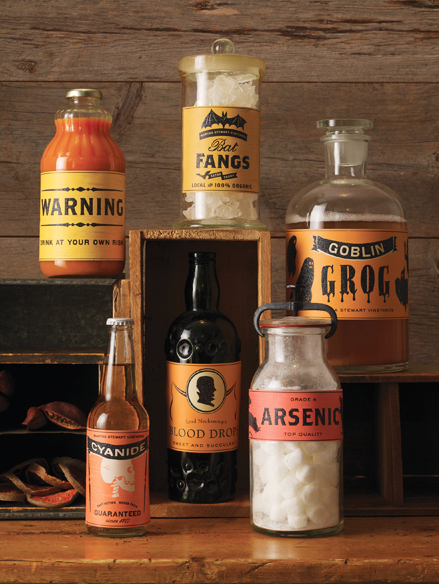
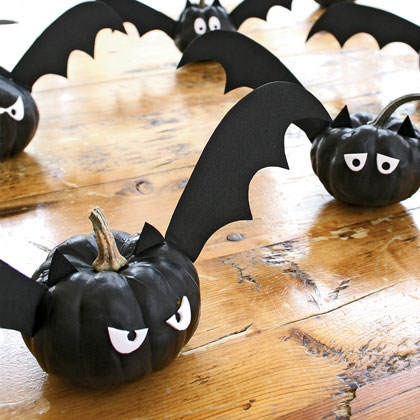
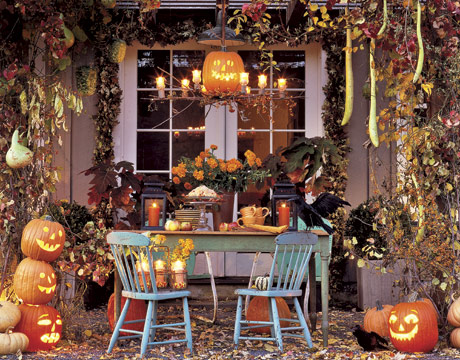
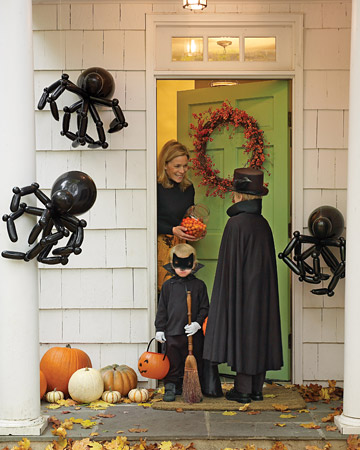
DIY Monday: Halloween Decorating Ideas
Reblogged from The Blue Bird Patch


DIY Monday: Scented Pine Cones

Since the weather is beginning to turn into fall (Well kind of for me ~ I do live in Florida – LOL), I have been itching to put some touches of fall around the house. I love the rugged look and smell of scented pine cones. Not to mention the fact that you can find them everywhere and for FREE! So this year I thought it would be fun to make my own scented pine cones and use them as fall decorations. It is quite easy to make and the kids can even join in on the fun. So let get Crafting!
Here’s What You Need:
Pine cones
Glue
Foam brush
Spices
Mixing bowls
Plastic bag
Spoon

Clean the Pine Cones – If you collected the pine cones yourself, you should clean them so you won’t have trouble with insects or sap. Wash them in the sink.

Clean the Pine Cones Pt. 2 – Place on a foil-covered cookie sheet and bake for 1 hour at 200F. Stay in the kitchen to watch for any smoke or fire, as there is a small chance due to the sap.

Prepare the Glue – Mix together equal parts of glue and water in a bowl.

Mix the Spices – Place your desired spices into a plastic bag and mix together. Some suggestions: Cinnamon, Allspice, Ground Cloves and/or Nutmeg.

Coat the Pine Cones With Glue – Dip a foam brush into the glue mixture and paint onto the pine cone.

Add the Spices – Place the glue-covered pine cone in the spice mixture bag, then shake.
Dry the Pine Cones – Allow the pine cones to dry in the bag at least overnight. Tap them when you take them out of the bag to remove any spices not sticking to the glue.

* Designer’s Tip – These pine cones can also be added to a fire to fill your home or campfire with a lovely aroma.
Source: About.Com

DIY Monday: Mesh Pumpkin Wreath

Happy Fall, y’all! This is one of my favorite times of year to Decorate! Decorate! Decorate! The changing of the leaves, the crisp cool air and the Fall nights growing longer and longer with each passing day. The sheer thought is getting me all gitty and excited inside. Oh how I love this time of year. Anywho, Today my friends I discovered a niffy craft idea of a pumpkin wreath made out of mesh. This wreath would transition perfectly on any door from the beginning of Fall all the way to Thanksgiving. So without further a due here’s how you can make one or two or three of your very own. Happy Crafting!
Here’s What You Need:

We attached our latch hook canvas to the hoop using wire and trimmed the ends to give us a base for our pumpkin.

Roll approximately 10 inches of mesh and cut. Make this into a little roll.

Twist 1/2 of a orange pipe cleaner around the middle of your roll to create a bow-type object. Make sure the pipe cleaner is super tight. Then, thread the pipe cleaner through the holes in your canvas and twist on the back. You won’t need to put one through every single hole, just keep adding to the wreath until it fills in.

Keep going, you’re almost done.

When your wreath is as full as you’d like, add the stem and leaves with the rest of your mesh. Voila! Hang on your door and enjoy 🙂
Source: Fleur de lis and Footbal

DIY Monday: Homemade Febreze

I love the smell of a fresh & clean house and when it comes to making your house smell good, there’s nothing like some Febreze to do the job. Ever since Febreze made it’s debut in stores I buy this stuff like crazy. Honestly speaking I go through two bottles a month but at over $5 per bottle, my pocketbook isn’t as fond of it as I am. But not anymore. You see my friends, I have stumbled across a recipe on my new best friend Pinterest for homemade Febreze. What You Say? YES! Homemade Frebreze. So put that money back into your wallet and make you a batch today. You and your home will be glad that you did.
Here’s What You Need:
1/8 cup Fabric Softener
2 tablespoons Baking Soda
Hot water
Spray bottle
Large measuring cup

Mix fabric softener and baking soda in a measuring cup until smooth.

Fill measuring cup with hot water and stir until well mixed.

Pour into spray bottle and fill the rest of the way with water.
Twist the nozzle over to the LOCK position and shake well.

Ready, Set, Go! and spray every fabric surface in your house.
Source: FakeitFrugal

DIY Monday: “No Sew” Fringed Infinity Scarf

You may know that scarves are the hot accessory trend right now! And anyone who knows me, knows I’m a HUGE scarf lover! I own so many scarves I can’t keep up. I wear them all year round and with just about everything. So to welcome in the Fall/Winter season I am posting a tutorial I found on the internet that is SO COOL! It’s an easy-peasy, do it yourself, no sew, infinity scarf project you can do in the comfort of your own home. So Without Further A Do Let’s Get Crafting!
Here’s What You Need:
Old T-Shirt
Good Scissors

Go through your old T-shirts and find a daring print or color combo. For a cleaner look, choose a solid.

Cut horizontally across the shirt, just below the armholes, to create a rectangular tube.

Working your way around the tube, make a series of vertical cuts that extend from the raw edge upward. The longer the cut, the longer the fringe will be.

Tug down on each strand to elongate it. You can also have some additional fun with it by knotting some of the ends!
Now all that’s left is to show it off with that perfect outfit.
Source: Lakeland Local

DIY Monday: Bath Bomb Fizzies

If you are as old as I am I’m quite sure you remember the all famous line of “Calgon take me AWAY!” Well today my friends I have just the thing for you, BATH BOMBS. Everybody loves bath bombs. It’s like taking a bath in champagne, only without the show tunes and chorus boys. They are fairly simple to make and are the perfect gift for that special someone. Or just simply use them as a special treat for yourself.
For this recipe, the ingredients are pretty common and easy to find in most areas. Essential oils can be found in small amounts at places like health food stores and craft stores. Just make sure, if you buy fragrance oil, that you are buying “body safe” oils and not the stuff for candles or oil warmers. So get the music playing, the candles lit and the wine poured. It’s time to get pampered.
Here’s What You Need:
6 Tablespoon citric acid
2 Tablespoon cornstarch
3 Cup baking soda
1 teaspoon fragrance or essential oil
4 drops food color
5 Tablespoon vegetable oil
Circular Mould, Optional
Storage Container
Mixing Bowl
Waxed Paper
Tiny Cup or Bowl
HAND SHAPE METHOD

1. Mix all dry ingredients listed in Things You’ll Need (citric acid, cornstarch, baking soda) in a bowl.

2. Mix some vegetable oil, fragrance and coloring together in a different bowl or cup.

3. Slowly pour the oil mixture into the dry ingredients. Mix well.

4. Create the ball shapes. When all ingredients are well mixed, roll the mixture into 1″ balls, and set them on waxed paper to dry.

5. Allow to harden. The bath balls/bombs will be semi-hard within 2-3 hours, but require a full 24 to 48 hours before they’re fully dry and ready for storage.

6. Store bath balls/bombs in a sealed container, away from moisture.
7. Add a few to the bath and enjoy! For gift giving, the balls/bombs may be placed in individual candy cups. Or wrap in cellophane with a satin ribbon for a more sensuous look.
MOULD METHOD

1. Mix together some citric acid powder and baking soda. Mix them together really well.

2. Add a colouring of your choice.

3. If you want it to be fragranced, add whichever fragrance you want. For example, you could make a purple bath bomb with a lavender scent.

4. Put your mixture into circular moulds.

5. After a few minutes take the bath bombs out and leave them to dry. This usually takes 3 or 4 hours.

6. Then your bath bombs will be finished and ready to use!
*Designer’s Note(s) –
1) Either fragrance and/or coloring is optional. or use vinegar!
2) Suggested vegetable oils include coconut oil, avocado oil, apricot kernel oil, sweet almond oil, or olive oil, although any emollient oil is good!
3) Use small molds to make three-dimensional fizzy bath shapes.
Source: wikiHow

DIY Monday: Homemade Lunchables
Re-blogged From: The CSI Project

Homemade Lunchables
By: Nike
I’m thrilled to be here sharing back to school ideas this morning to help me and my six kiddos this year!
So here’s the deal:
I have a love/hate relationship with my kids’ lunches.
I hate shopping trips with my kids begging for all the pricey, pre-packaged lunch stuff that’s loaded with preservatives and wasteful packaging.
Sheesh that junk is expensive.
But the convenience? Oh how I love the convenience.
And there are times of the year when our schedule is so crazy that I cave and load up the cart with lunchables, little bags of crackers and jello packs just so that we can pull a lunch or snack together in two seconds flat.
But no more!
I’m here today to share my plan to eat healthier, save money and still enjoy the convenience that me and my kids crave. And I hope you’ll tweak the ideas below to fit your family’s budget and nutritional preferences.
#1 – The Lunchable

Why?
Reusing the store bought tray and packing your own lunch meat, real cheese, crackers and a little treat will save you 40% — $0.60 for homemade vs. $1.00 for the store bought one. Plus the homemade version boasts real cheese, extra calcium and fewer preservatives.

A quick layer of Glad press ‘n’ seal or aluminum foil keep everything in place just like the original.
Don’t have a left-over lunchable tray? Or want a bigger tray to up the serving size for older kids?
No problem. You make your own dividers like I did for this dollar store container using an empty milk jug.

And that extra space means you can supplement that lunchable with some fruits and veggies without spending more than the store bought version.

Which $1 lunch would you rather send with your kids?

For a drink my kids prefer the juice pouch …

… while I’m more in favor of the reusable water bottle which make lunch $1.20 the first day and $0.98 every day after.

So we’ll do both: water most of the week and juice boxes on Friday for a little bit of a treat.
Either way these lunches come in significantly less than our $1.60 school lunch and WAY CHEAPER than the big-drink-included-lunchables at the store:

Really? $3.00 for a $1.00 lunchable and $2.00 juice pouch? Um, no thanks.
#2 – The Pudding & Jello Packs

Why?
Reusing those little cups (or the small tupperware containers with lids) and making your own will keep the cost and preservatives way down.

Same thing for the gelatin cups:

Making just this switch alone will save you a truck load. Six cents a cup vs. $0.56 for Jell-o brand? You could easily cover back-to-school paper supplies, back packs and shoes with just that little switch.

#3 – The Fruit Cups
The reduction in packaging, costs and preservatives make these easy switches.


#4 – The Mini Cracker Bags

You can enjoy the name brand crackers and still save almost 40% when you prepackage them yourself using $0.01 snack size sandwich bags. Just check out the cost per serving:

If you don’t mind generic, you can reduce those costs another 50+ percent.

And it’s just as convenient to grab a home-packed bag as the store packaged variety. The only difference is the price.

A few more THRIVE tips:
1. The ideas above are only guidelines. Each family will have their own nutrition and budget preferences. The idea is that by getting creative with recycled/reusable packaging, you can still enjoy the convenience of off-the-shelf while controlling costs and ingredients. So feel free to make your own tweaks with whole grain crackers, organic produce and nitrate-free meat. Or try packing a lunchable with mini tuna or PB&J sandwiches. Have fun!
2. Make your kids help with the prep work! They’re the ones asking for the “cool” packaging so they can help. It’s also a great way to teach basic food prep and math skills like measuring ingredients and dividing portions.
3. Have your kids help you shop! Don’t laugh — I’m serious. This is a fantastic chance to practice real life math skills as they determine price per unit, ounce or pound. There’s also lots of fun ways to to teach math, spelling and budgeting with kids during shopping trips here.
3. Have cheese for sandwiches or lunchables pre-sliced at the deli. I buy the economy loaves and have them sliced right there at the store for no extra charge. It saves so much time and keeps the portions equal.

4. Rock What Ya Got! If your kids are like mine and want the meat for their homemade lunchables to be round like the store bought variety, trying using the lid of a spice jar. (My cookie cutters aren’t the right size). Stack the meat in three layers and cut away. The lids from my 2/$1 Walmart spices worked perfectly.

And don’t toss those scraps! I save mine in a ziploc bag in the frig to use in omelets and salads.
5. Incorporate fresh produce from the garden! Now is a great time to up the nutrition with yummy, home ground fruits and veggies. I love it when I can ditch the high fructose corn syrup fruit snacks and send my kids with the homemade variety.

They have a soft, chewy texture like other dried fruits and are only $0.01 per serving vs. $0.20 for the cheapest store bought variety! You check out the recipe here.

Yum!
… and finally …
6. Pennies add up! I know some of you may look at $0.25 or $0.50 savings a day and think it’s not worth it. But trust me – it so is! My kids have been back to school for a month now (year round school) and I’ve kept track of what we would have spent to buy the prepackage stuff vs. packing our own. So far our averaging savings is around $8 a week.
If our family takes out the money saved each week and transfers it into savings (or puts it in an envelope Dave Ramsey style), that $8/week times 25 weeks of school should work out to $200 by the end of the year. And $200 divided between my four school-aged kids equals $50 a piece, or enough to buy a new pair of shoes, back pack and classroom supplies for each of them.
Eating healthier, using less packaging, teaching my kids about cooking-meal planning-math-budgetting AND financing back-to-school shopping for next year? That’s so worth it to me!
Hope you and your kids have fun shopping for your own creative ways to make smarter lunch choices! And be sure to stop by THRIVE for more ideas for living and crafting without spending a dime. Hope to see you soon!
COPYRIGHT © 2012 · GENESIS FRAMEWORK
